Using PHP 7 on Ubuntu 14.04 with Codeanywhere
I am a big fan of online IDEs. For me this enables me to do web development pretty much anywhere, on any device. My particular favourites are Codeanywhere and Codenvy. While both have their pros and cons, I pretty much use Codeanywhere free for my day-to-day development. It gives you a temporary VPS for your code, easily accessible, great no-nonsense IDE and easy to use SSH access. Perfect, I simply fire up the container and get to work.
I do have a problem with it however, and it isn’t something you can fault them for – Ubuntu 14.04. I love every release of Ubuntu, but nobody should be running PHP 5.4, which has been EOL for a long while now. PHP has made some massive strides since then with PHP 7, with 7.2 being the currently latest iteration. So the first thing I do is get the container as up to date as I possibly can get it.
They do have a PHP 7 container available if you go down the CentOS route, but I personally encountered dependency issues running their version. However your milage may vary, so if you are a fan of CentOS, you don’t need to continue.
Container Creation and Update
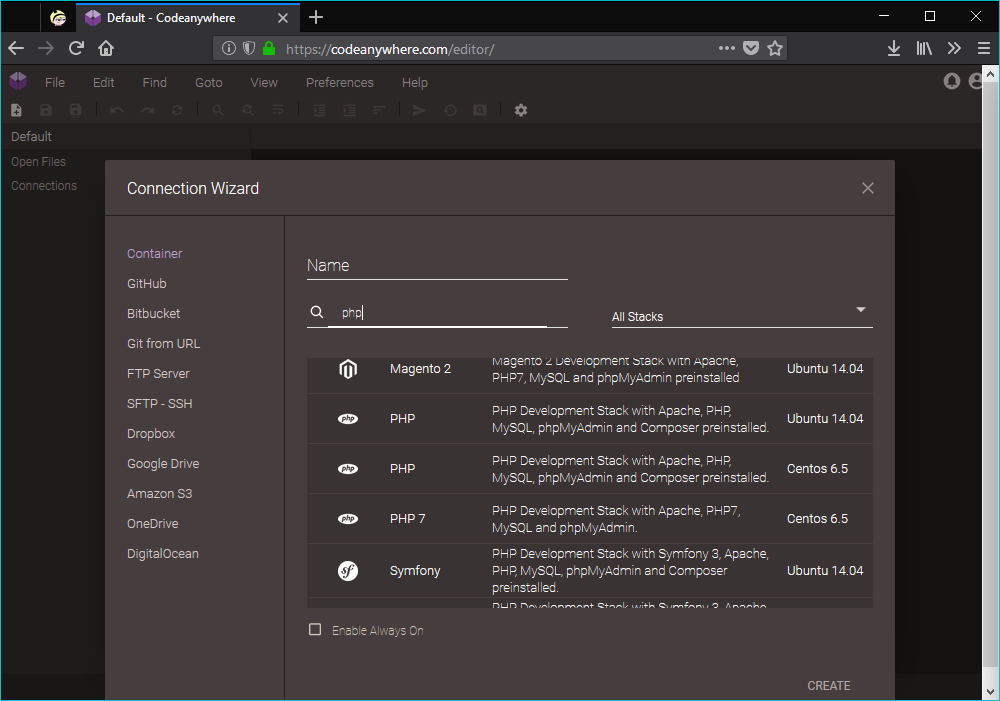
Once you’ve logged in to Codeanywhere, it will ask you what container you want to setup (otherwise, File > New Connection > Container). In this instance, we will select the Ubuntu 14.04 version of the PHP containers.
Once finished, you’ll have your own personal VPS for your project(s). Before we do anything, we need to make sure your Ubuntu box is up-to-date. For this we need to run the commands that every Ubuntu sysadmin is familiar with:
sudo apt update && sudo apt upgrade -y
‘update’ will tell your VPS what new updates are available, and upgrade will upgrade said packages (-y stops it asking if you want to proceed, if you do want to check it before installation then remove this).
In my scenario, it asks if you want to replace some pre-existing system configuration files. You can simply press Enter and skip through these.
Once finished, you’ll have an up-to-date container. We can now move up to PHP 7.
Updating PHP 5.4 to PHP 7
The current repositories for 14.04 do not use PHP 7, supporting 5.4 as the maximum. So we need to add a new repository to do this. Now, for some reason certain system functionality from base Linux have been removed, so we need to re-add these features. Use the following command:
sudo apt install -y software-properties-common
We now need to add a repository that supports PHP 7 in 14.04. In comes Ondrej, a PPA repository that does just that!
sudo apt install -y language-pack-en-base
sudo LC\_ALL=en\_US.UTF-8 add-apt-repository ppa:ondrej/php
sudo apt update
sudo apt upgrade -y
Normally the LC_ALL line is not needed. However, in this repository some characters are used in the description which breaks with non-UTF8 languages. The extra command parts will make sure it uses UTF8 to process it, and go through fine.
Once all commands are run, your system will be running the latest available PHP version. However, Apache will still be using PHP 5.4. Command line PHP works great for tools such as Composer and PHPUnit, but our application will not use it until Apache knows it exists.
We need to install some additional PHP modules for Apache to recognise it, which can be done by this command:
sudo apt install php7.2 php7.2-mbstring
Add php7.2-mysql if you use MySQL, or add others for the extensions you need. Use sudo apt search php7.2 to find out what’s available)
Now we need to command Apache to ditch PHP 5 and use PHP 7.2, so run the following commands.
sudo a2dismod php5 && sudo a2enmod php7.2
Now restart Apache to make sure the changes are fully committed.
sudo service apache2 restart
Now you should be ready to develop using the latest version of PHP. With this repository, you should also receive the latest updates to PHP whenever you run the update command, so you should be good going forward!
Checking PHP Version
If you want to check which version of PHP you’re running, then you need to do it twice. PHP can often be used in command line as well as on a back-end server techonology like Apache or NGINX. It is possible for your Linux installation to use one version of PHP, and your web server application to use another.
To check your command line PHP version, simply run the following command:
php -v
To check the Apache version of PHP, create a new PHP file in the root of your workspace (say, info.php). Paste the following into the file.
<?php phpinfo();
Now browse to it in your browser (right click the container, and click run. Then, add /info.php at the end of the URL). It should give you a full dump of the server technology, with the version right at the top.
Bonus – Quick WordPress Installation
This will install WordPress to /wordpress directory of your cabox. Run this command first which will set up the brilliant WP-CLI on your container.
sudo wget https://raw.githubusercontent.com/wp-cli/builds/gh-pages/phar/wp-cli.phar -O /usr/local/bin/wp && sudo chmod +x /usr/local/bin/wp
And this can be used to create our WordPress installation. Run in the workspace folder (Run cd ~/workspace if you’re unsure). Change theurlhere.com to the domain of your container, plus the /wordpress.
mysql -u root -e "CREATE DATABASE wordpress01;" && mkdir wordpress && cd wordpress && wp core download && wp config create --dbname=wordpress01 --dbuser=root && wp core install --url=**theurlhere.com**/wordpress --title="WordPress Development" --admin\_user=admin --admin\_password=password [\[email protected\]](/cdn-cgi/l/email-protection) && sudo chown www-data:www-data \*
This cuts down the famous 5 minute installation to about 15 seconds. Since this is development, I’ve kept things basic with the admin password simply being password.