And it also runs DOS too. Yes, it feels really weird.
If you’re a maker of any level of expertise, signing up to the Instructables Newsletter is a bad idea for your bank account. A week in and you’re looking at buying a laser cutter, a 3D printer, and an assortment of different power tools.
I’m in the camp of “Oh that’s looks cool… Oh I can’t afford any of this!”. But one thing I do end up with a lot of, is cardboard.
And then I saw the Mini Mac on Instructables…
🤔 What did I use?
I don’t have a 3D printer, so I was immediately scrubbed at that point. However, armed with my cutting knife (exacto knife I think it’s called across the pond?) and a truckload of cardboard from a household Amazon order, I got to work.
Without beating around the bush, I needed the following to make a cardboard Macintosh:
- Raspberry Pi Zero wireless, no header (Pimoroni – £9.30)
- I soldered a socket header to the Pi instead. The author has an alternative method which should work here too.
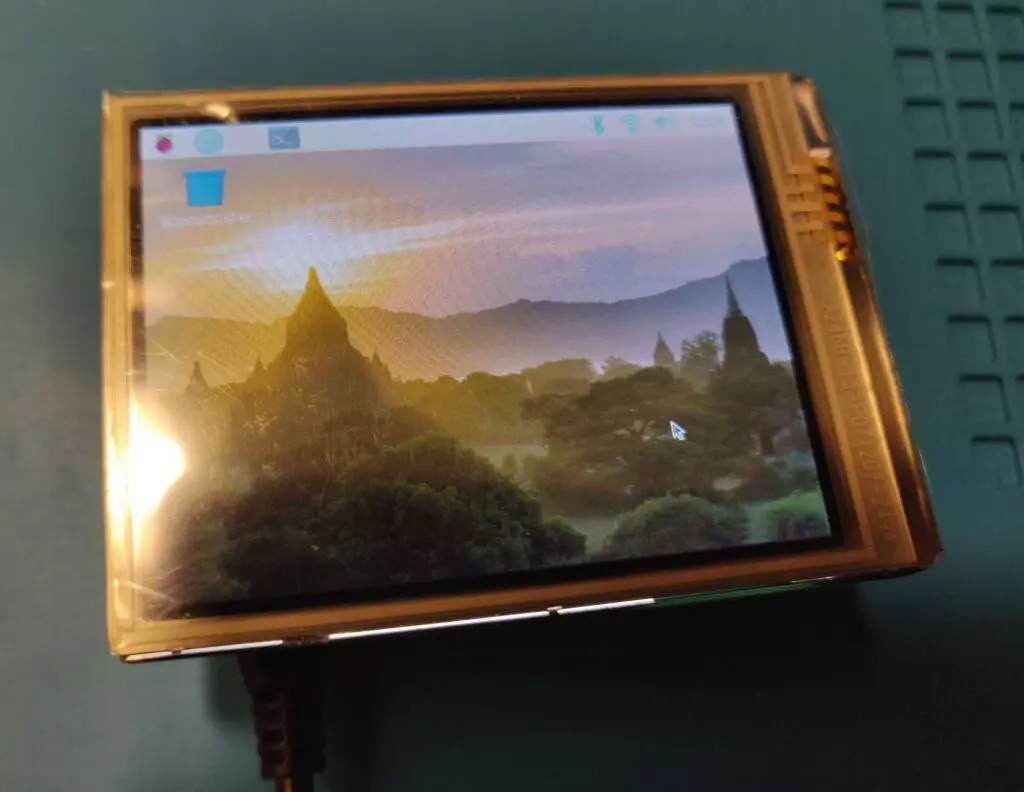
- Raspberry Pi LCD screen (AliExpress – £12.93).
- I used the same one as the author. Search the product code MZDPI-VGA-ZERO in AliExpress and you’ll likely find it at a reasonable price.
- Typically comes with a socket. If not, here’s one you can buy.
- MicroSD Card (16GB – Amazon – £6).
- MicroSD to USB adapter (Amazon – £8.99).
- Pause! Your laptop might have one built-in.
- MicroUSB power supply (Pimoroni – £8.40).
- Wireless/1 socket mouse and keyboard (Amazon – £15.99).
- Bluetooth might be best. if you get 2.4G dongle, you’ll need a MicroUSB to USB converter (£5) most likely.
- Soldering Iron (Pimoroni – £30).
- If you go Pi w/header + extension cable, it’s not needed.
- There’s also this header if you really want to avoid it. I’ve not tried it, so your experience may vary.
- Glue gun (Hobbycraft – £10).
- Definitely needed when working with cardboard. If the glue is too expensive, you can get it from AliExpress.
- Lots of cardboard.
- Just don’t throw order boxes out, and even a family of low online orders will have enough in 3 months.
My method managed to avoid both a USB Ethernet peripheral (so a Wireless Router is required) and requiring a HDMI screen to setup the display drivers, but it might also be good to have a Mini HDMI to HDMI adapter/cable too.
I had a lot of the parts already in my workspace, but the rough estimate I’d give to the cardboard Macintosh (excluding cardboard, I’m really clueless how much that’d cost) was around the £125 mark (including tools). If you get fed up down the line, all parts are reusable.
Here’s the software that you will need:
- Raspberry Pi OS (‘with desktop’ recommended).
- Etcher, a cross platform image writer.
- We need to edit a few Pi system files, so a good text editor is needed. We recommend the free and cross platform Visual Studio Code.
- Display driver, but this will be done on the Pi.
- We’ll be dealing with non-standard archives, so I recommend 7zip for Windows or Keka for macOS to export them properly.
And finally, the optional extras:
- Beverage (alcohol not recommended).
🥧 Setting up the Pi
First Steps
Installing Raspberry Pi OS is incredibly complicated, and requires a lot of books and online courses to learn how to install. Just kidding, it’s a few button presses!
Connect your MicroSD card you’re dedicating to the Pi into your computer, via either an adapter or a laptop SD card reader. Fire up Balena Etcher. You’ll be asked to select:
- Your MicroSD (if it’s the only one plugged in, it selects auto).
- Your Raspberry Pi OS you downloaded earlier (if it doesn’t appear, extract the archive).
Check to make sure you’re not about to wipe your entire PC of all your precious cat GIFs, and click Flash. Pop on a video on YouTube and wait for the flash + verification process to complete.
Done? Eject, but plug the MicroSD back in again. We’ve got some tinkering to do.
Preparing for Headless
The problem here is if we go and whack it straight into the Raspberry Pi and power it up, Raspberry Pi OS will expect a screen and for us to configure networking. Ideally, we want to get this done beforehand, and it’s super easy to do. For the curious, we’re setting this up headless.
Depending on your platform, you might now see between 1-3 new mysterious storage locations pop-up. We’re looking for the one called BOOT. Go into that one.
Create a blank file ssh inside this directory. On Windows, you might need to temporarily turn off hide file extensions, create a new text file and remove the .txt extension. If it moans, your text editor’s save as dialog should be able to achieve it.
Create another file in this directory called wpa_supplicant.conf. Open this file in a code editor, and change the contents to this, replacing the with your own information:
ctrl_interface=DIR=/var/run/wpa_supplicant GROUP=netdev
update_config=1
country=<Insert 2 letter ISO 3166-1 country code here>

network={
 ssid="<Name of your wireless LAN>"
 psk="<Password for your wireless LAN>"
}
So what have we done? The ssh file enables SSH from the start. SSH allows you to access a command prompt for the device from anywhere in your network, so long as you have login information. This will let us install the display driver without an existing display.
The wpa_supplicant.conf does a similar thing. When the Pi sees this file, it will turn the on-board WiFi on and use the contents of this file to connect to the wireless network.
Once you’ve done all this, eject the MicroSD from your computer, whack the MicroSD card into the Pi Zero, and connect it to power. Here’s another time to whack something on YouTube, as initialisation will take a while. I recommend leaving it 10 minutes before thinking something’s wrong.
Setting up the display
Left it a while? Good, by now it should’ve connected to your network. This is where things may get a bit… Fun.
On Windows, I generally find that I can try ssh pi@raspberrypi and job done. However, on both macOS and Linux this has been a nightmare, presumably thanks to my network’s router. If you’re in the same boat, try raspberrypi.local. Doesn’t work? try loading up your router’s configuration page – it might have a non-login list of devices on your network.
If you get a prompt for a password – try raspberry. Congratulations! Now we can setup the display.
The display driver we will use is found here on GitHub, if you’re using the display mentioned in the parts list. This is installed by running the following commands on your SSH connection. Run the following (taken from the GitHub page):
git clone https://github.com/tianyoujian/MZDPI.git
cd MZDPI/vga
sudo chmod +x mzdpi-vga-autoinstall-online
sudo ./mzdpi-vga-autoinstall-online
sudo reboot
The commands, broken down, do:
- git clone will make a copy of the files you see on the webpage, in a directory named after the repo (MZDPI). Git is very complex and is essential knowledge for code development, see here if you’re interested in learning more.
- Change into the ‘vga’ directory of the cloned Git repository.
- Tell the system we want to make the script mzdpi-vga-autoinstall-online executable (otherwise the next command will throw an error).
- Run said script
- I’ll revisit this with a breakdown of the script actions, but generally it’s a driver that will read the GPIO pins and let the Pi know it’s a functioning display.
- Finally, reboot our Raspberry Pi.
- Running ‘reboot’ over an SSH connection will only reboot the machine you’re connected to. On your PC, it’ll just show the message “host terminated the SSH connection” and leave it be.
If all has gone correctly, your Pi screen drivers will be ready for us to connect the LCD display onto! I’ll move onto the ‘hardware’ setup for now, and come back to the emulation software in a bit.
For the security conscious, I don’t recommend switching off SSH yet as we will be using it for SCP (file transfer) a bit later. If you want to strengthen your Pi security, here’s some good recommendations on setting up key-based authentication.
🛠️ Constructing the Cardboard Macintosh
You can now solder the socket header to the Pi, if that’s the route you’ve taken. You want the socket aspect of the header to be underneath the Pi. We want the Pi to be facing away from the screen when it is attached to the screen (away means the big CPU chip is facing you, not the screen).
The MagPi magazine has a great guide for soldering Pi GPIO headers. My advice for soldering the header is to start with the corners, as once you’re done it’ll keep the header stable within the GPIO sockets for you do to the rest. Solder by briefly touching/tinning the soldering iron onto the solder, then use the iron to heat up each pad & pin. Put the solder into this heated area (without touching the iron directly) and it should flow straight onto the pad. If you’ve got a triangle-like solder pad, you’ve done good.
If you’ve got a multi-meter handy, you can use one to test how strong your connections are in continuity mode. You’ll likely get bored doing so, so long as they’re all visibility soldered and your ground and 5V rails are fine you should be good to go.
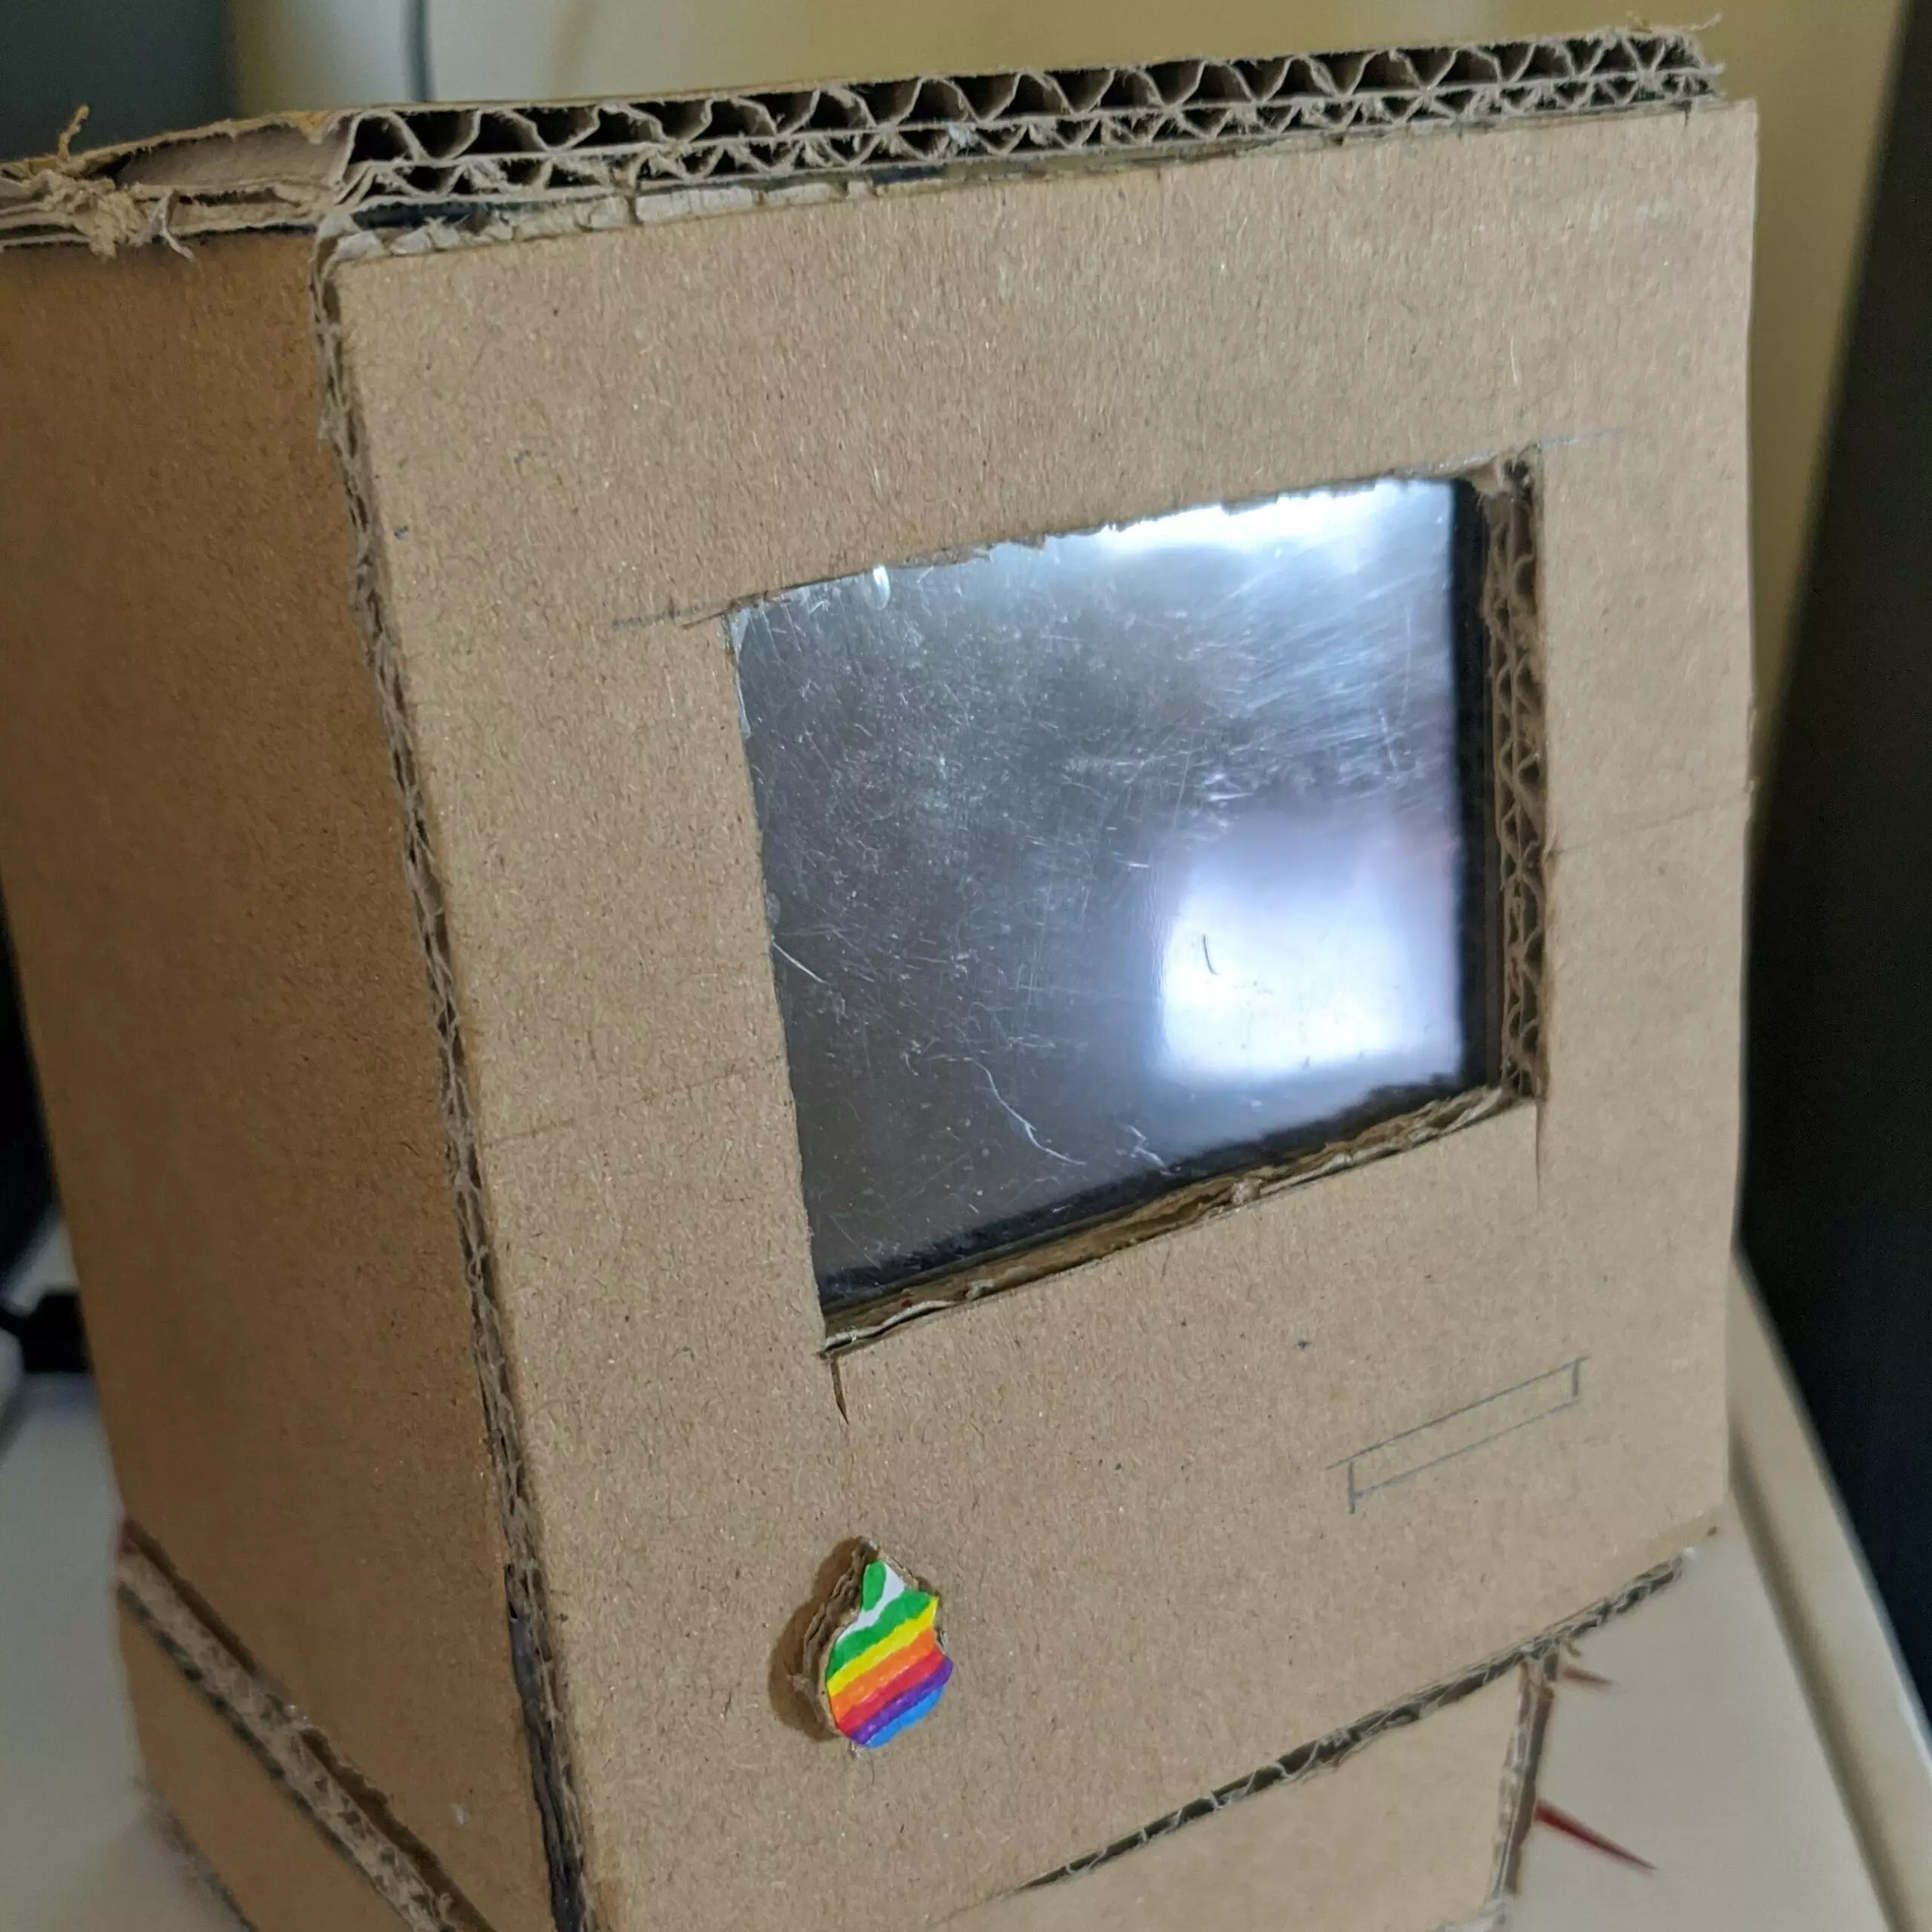
Cardboard will require some creative ingenuity from yourself. Personally I found it was handy to get the SketchUp model from the original Instructable and follow that as a guide. I have no real good advice here, other than I got to where I am by lots of trial and error. It’s depending on your own level of pefectionism, as I was quite happy to have mine vaguely computer looking.
To get a stable mount of the Pi screen, I opted to essentially make a thin wall of cardboard that would go up the side of the screen and hold it with friction. I ended up losing quite a lot of hot glue at this point, but the wall worked and keeps the screen pressed up to the gap in the enclosure.
My plan is to come back to this project with a way of having ports facing outside the cardboard. For now I would make a hole in the cardboard and pull the power and data cables through there. Or my personal choice to not damage the enclosure for now – slant the roof/lid and pull it in through there.
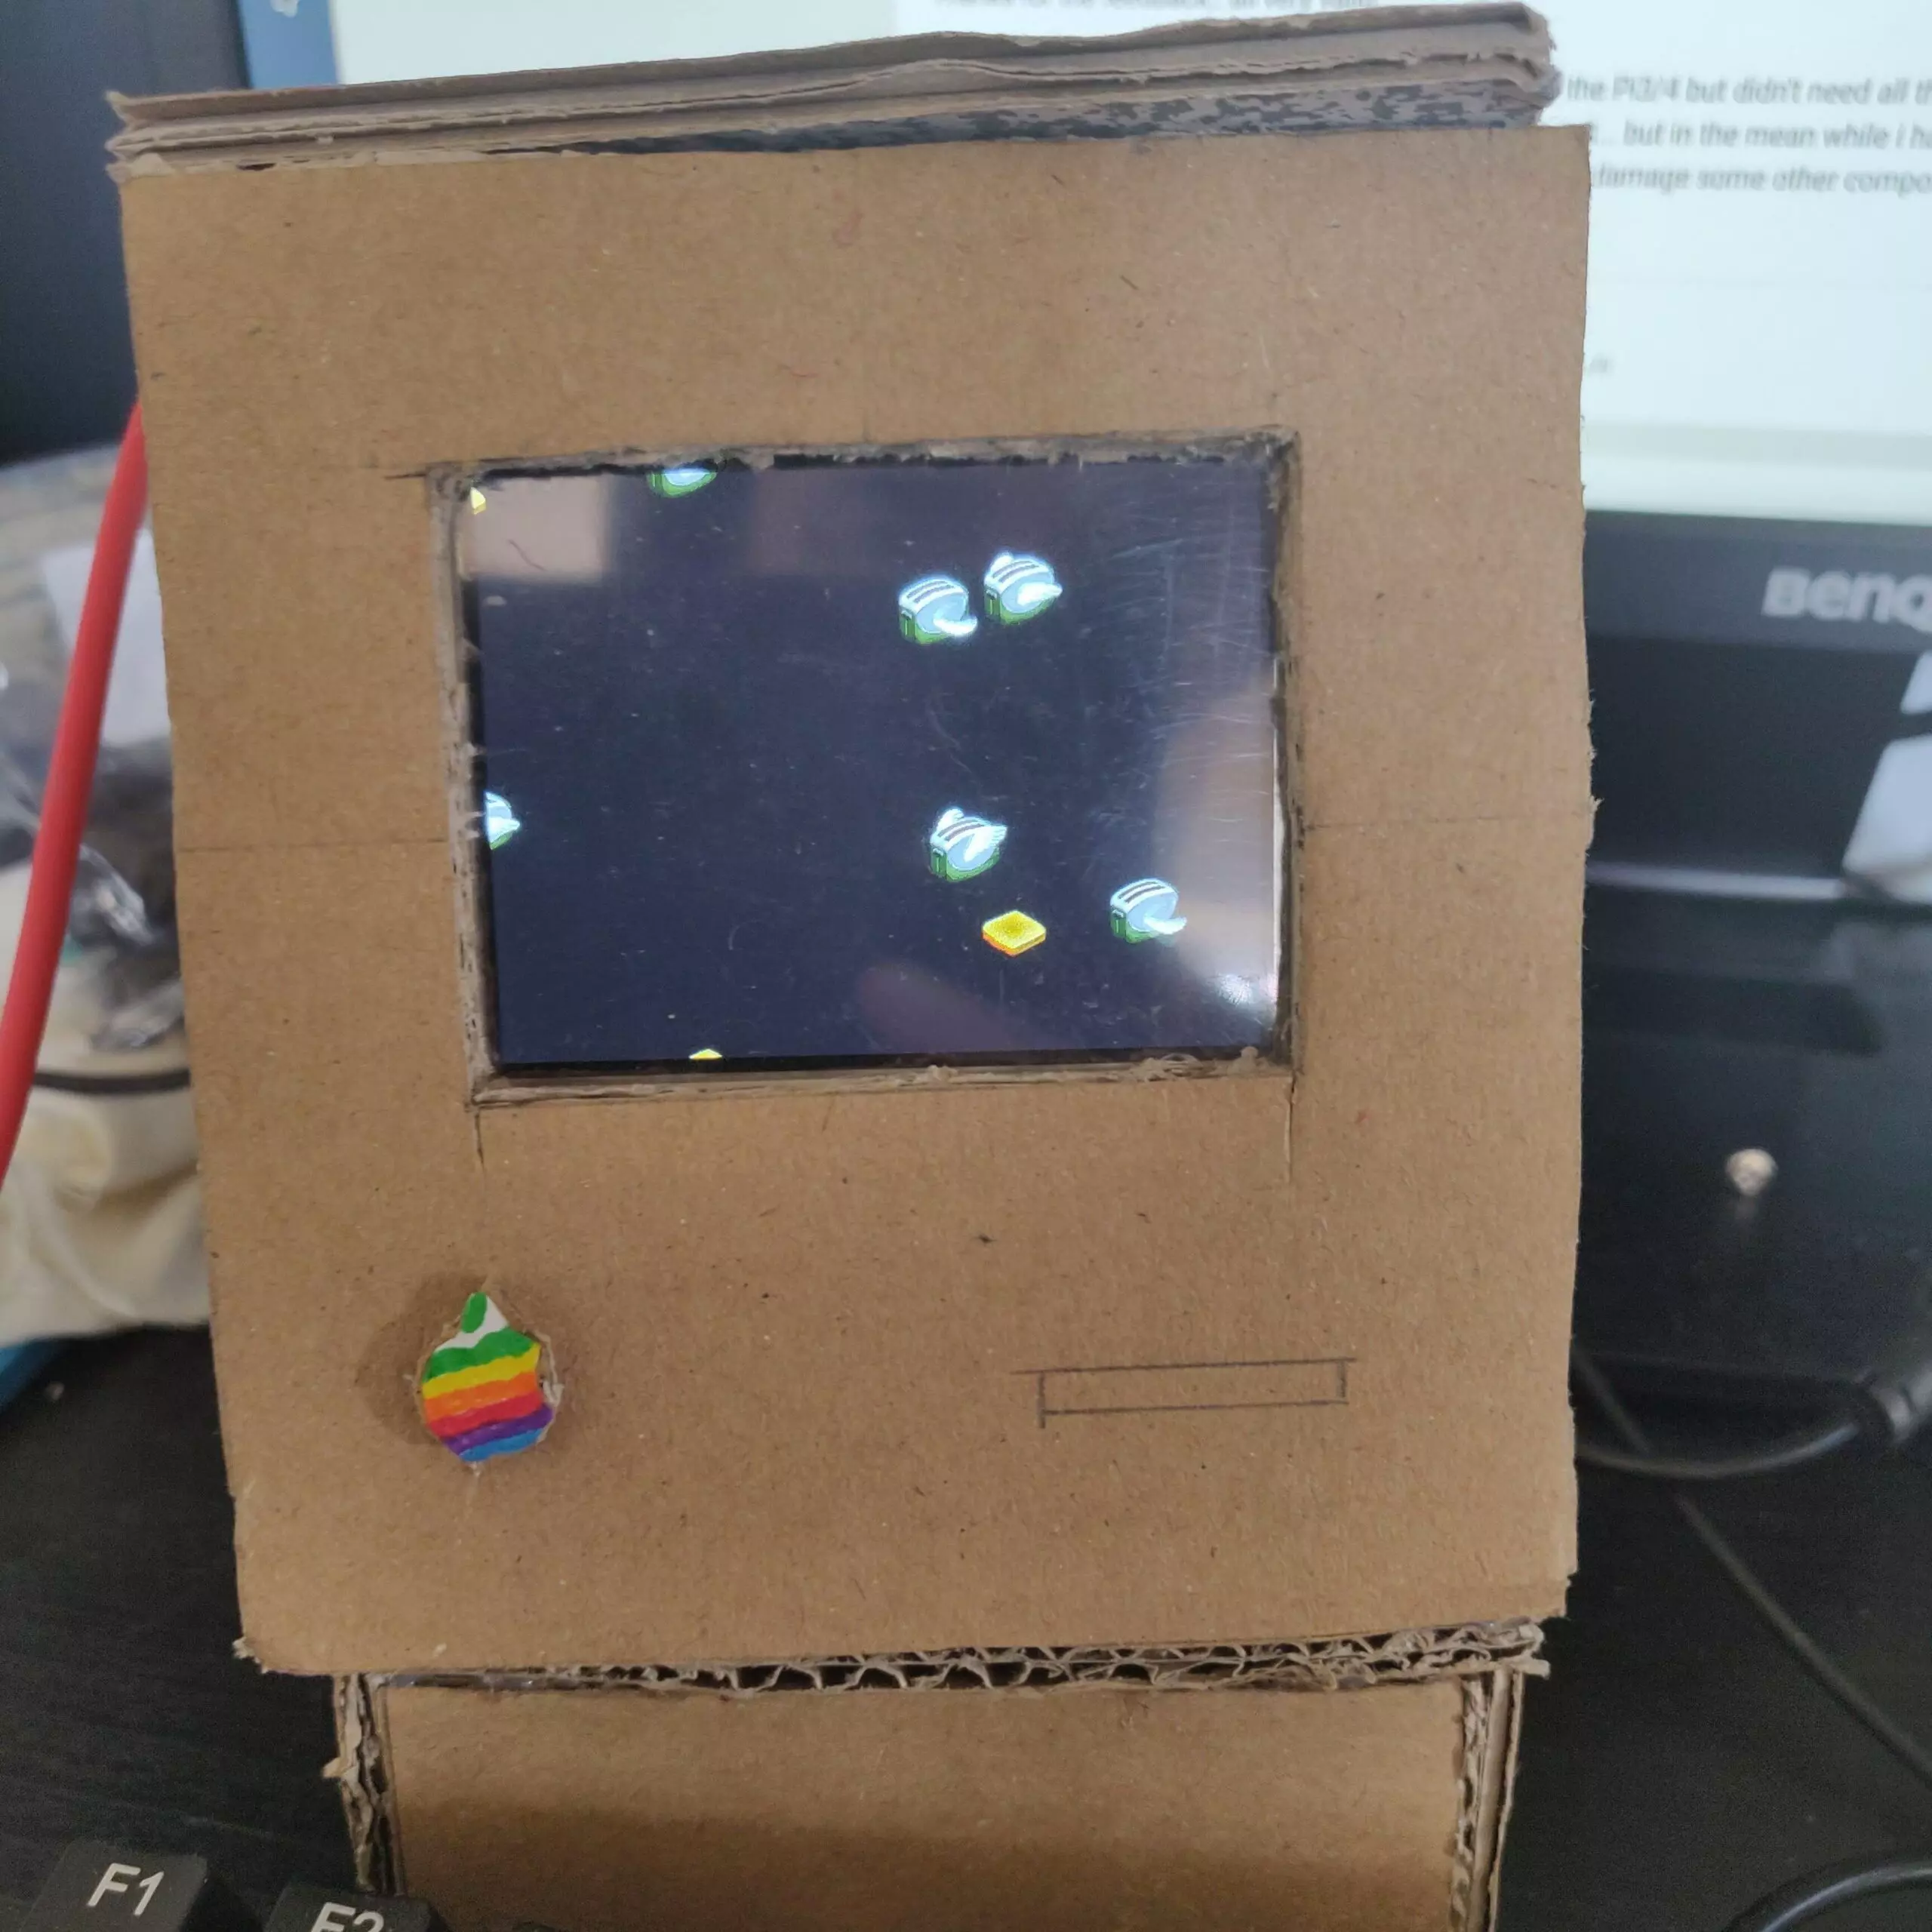
At this point, you should now have a neat looking little cardboard computer that runs Raspberry Pi OS quite fine. You could stop here if you want, because this is pretty damn cool in itself. Up next I’ll talk about how to emulate the OS the Macintosh would’ve used back in the day.
🍎 Emulating System 7
Pre-preperation
You’re best following the Instructable here, as their explanation is absolutely perfect. If you follow the guide you can skip this step here entirely, but I’ll explain it for anyone who’d want my chaotic style of explanations.
Since the Pi itself won’t run System 7 (incompatible processor), we will need to emulate a Motorola CPU. This will use the amazing Gyphel Project vMac emulator. This software will make a virtual sandbox of a Macintosh on your Pi, translating all system resource commands to the Raspberry Pi. This is intense work, but the Pi Zero is crazily capable of handling this well.
The Instructable author has pre-compiled the ARM executable you’ll need for both the Raspberry Pi and the screen size. You can download it here (or my copy if it’s since taken down). The one we’ll primarily need is Mini_vMac_ARM (other one’s good if you’re on a VNC session).
Create a folder on your PC, and call it Macintosh. Extract your zip of executables here, and we’ll add the upcoming resources here too. Once we’re done, we’ll move the whole bulk over to the Pi.
First we need a system ROM. Visit this archive site and download the file 9779D2C4 – Macintosh II.7z. Extract it to our Macintosh directory and rename the file to MacII.ROM. The emulator will use this as the basis (virtualised guts so-to-speak) of the system.
Next, we need to install System 7.5.5 on the emulator. For this we need a virtual disk drive, and install medium to achieve this. ToughDev has a fantastic write-up on this, but for this guide you can download the resources he provides (where it’s labelled Download the above files here).
This package contains System 7 install medium and two upgrade packages up to 7.5.5, and a blank drive we can use to install onto.
Inside the hfs500M.rar archive is hfv500M.dsk. Extract this file to our Macintosh directory and rename it to disk1.dsk. This is our virtual hard drive.
Inside the Mac701.zip is a folder Mac701. This contains a load of floppy installation medium images. Move this Mac701 folder (not the loose files, or you’ll be doing some awful cleanup later) into your Macintosh directory. This is what will setup System 7 initially into your disk drive.
Finally, the mac753.zip and mac755up.zip archives contain .img files. Move both these .img files into your Macintosh directory. This will boost our cardboard Macintosh from 7.0.1 to 7.5.5.
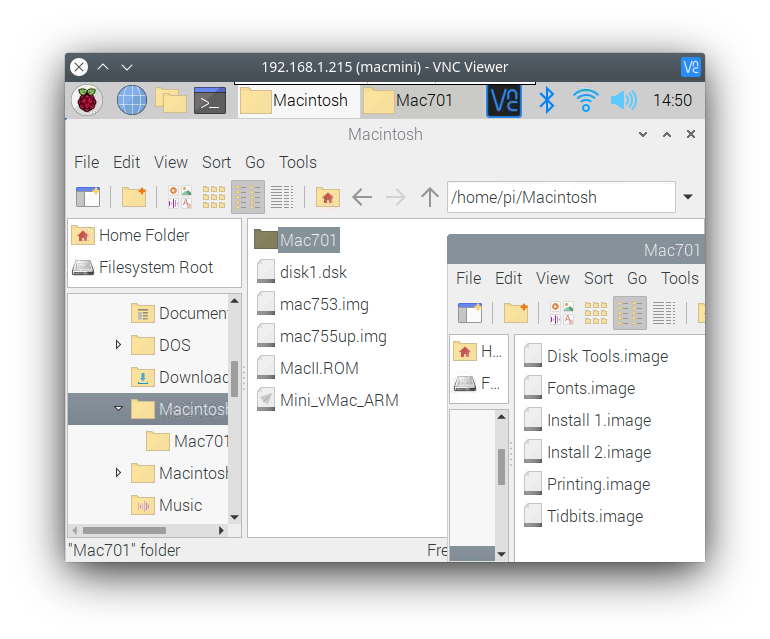
This is what your folder structure should look like.
Moving to the Raspberry Pi
You can now move this Macintosh directory over to your Pi. There’s several ways we can do this:
- Over the network via SCP (we’ll cover this).
- Over the network via FTP (Instructable covers this).
- Via USB stick (if you’ve got a MicroUSB to USB hub).
- Directly via mounting MicroSD to PC (advanced – needs Linux).
If you didn’t turn off the SSH setup from earlier, we can do this via SCP. If you’re on a PC, you’ll need WinSCP for this. For all other platforms, your system will handle this like a normal shared directory.
On macOS, in Finder go to go > Connect to Server and enter sftp:// (similar to how you connected for setting up the display). If successful, you should see a load of folders appear. We want to travel to /home/pi.
In this folder, copy your Macintosh folder here. This might take a little while, but once done you can now start running the emulator.
Installing System 7
We’re now moving to the Pi to setup System 7. If you find the screen too small to work with, you can enable VNC to see your Raspberry Pi screen on your PC or a mobile device.
On your Pi, open up file explorer and go to your Macintosh folder. Double click on Mini_vMac_ARM and select ‘Execute’. Suddenly, you’ll be greeted to a full screen view of a Macintosh screen with a flashing floppy disk icon. Don’t worry, this is expected.
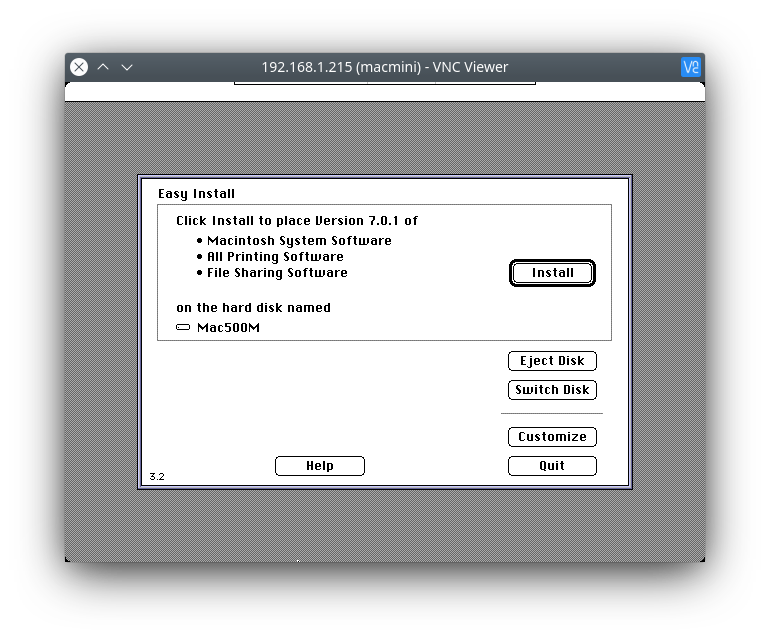
Press ctrl – F to exit full screen mode. Outside the emulator, open the Mac701 folder, and drag Install 1.image onto the emulator screen. This will virtually mount the image file as a Floppy disk in your emulator. Neat! Go back up a folder and drag your disk1.dsk into the emulator screen. Your cardboard Macintosh should now ask if you want to install System 7 onto Mac500M. Now click install.
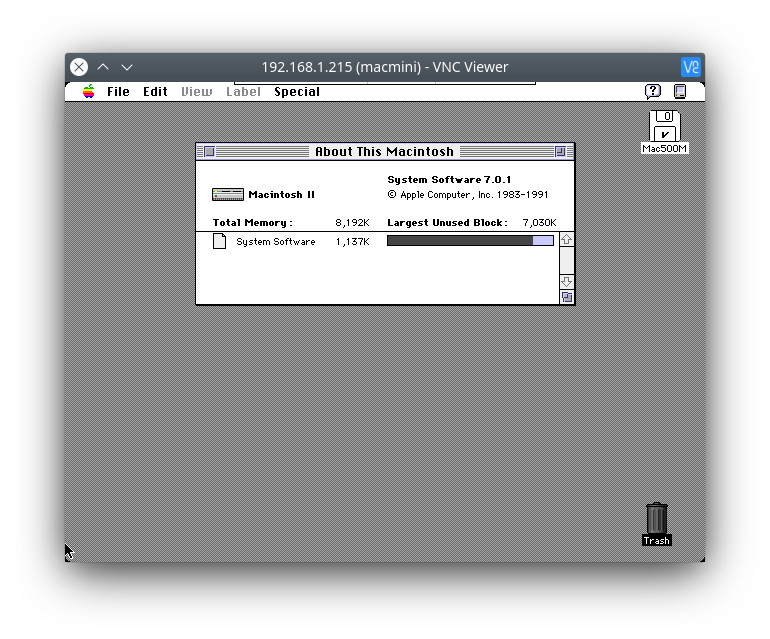
It will ask you to mount various disks during the installation process. All of the ones it needs are in Mac701 directory, so drag them onto the screen when prompted. It won’t take too long, and you’ll soon reboot into System 7. Congratulations!
If your drive disk is called disk1.dsk and is in the same directory as the executable, you can just double-click the executable and it’ll boot. If you’re faced with a flashing floppy disk any time post-installation, drag disk1.dsk onto the screen.
Updating System 7
You can stop here if you wish, but we can take it right up to the latest version of System 7 – 7.5.5!
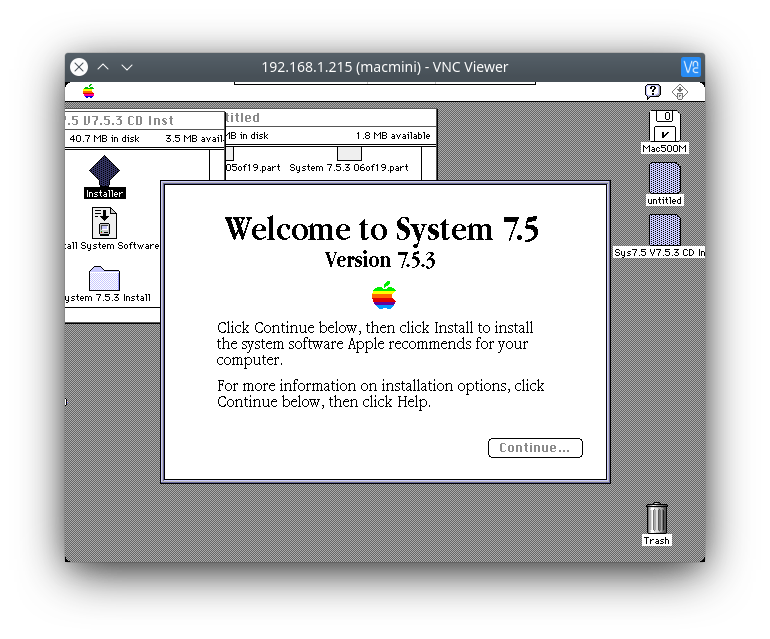
Upgrading is very different to the installation. Boot your cardboard Macintosh, and once you’re in the system, drag mac753.img onto the screen. This will then appear underneath your hard drive in the virtual Mac. Double click on this, and click on Installer (for 7.5.5, click the first part, click agree, then it mounts). Follow the instructions, and you’ll soon be on System 7.5.3.
Do the same process again for the mac755up.img file. Same thing again, and woohoo – we’re on 7.5.5!
😱 Bonus – Install Windows 3.11
Now you can achieve something that was definitely seen as impossible (and sacrilegious to the Apple fans) – You can install Windows on your cardboard Macintosh.
Whereas Apple was generally a closed-off system, Windows 3.11 was designed to be more portable, so installation is a little bit easier. However, the trade-off is that there’s no specialist software (yet) for it, so we’re misusing a game emulation package to get 3.11 working – DOSBox.
Dosbox is actually available on the Pi repository system. You can install it by running:
sudo apt install dosbox
Make a folder in your home directory on the Pi and call it DOS (alongside your Macintosh folder). Inside this folder, make a folder called C. You may have figured it, this is going to be our C drive.
We want C to mount when you startup dosbox, so run nano ~/.dosbox/dosbox-0.74-2.conf in Terminal, and add the following line (right at the very end under [autoexec]).
MOUNT C ~/DOS/C -freesize 2048
While you’re here, you can get a more immersive experience by turning fullscreen to true. Alt-Enter will let you escape like how Ctrl-F works in vMac.
Now when we start-up Dosbox, our C drive will be present.
On this Kirsle page, they have a copy of Windows for Workgroups that has already been unpacked from floppy disks. Make a folder in your DOS directory called W311. Download that copy (11 MB) and extract it to the W311 folder. This is your installation medium.
Start up Dosbox, and you should be greeted by a Z:> prompt. Type the following command to mount our installation medium:
MOUNT G ~/DOS/W311
You should be greeted with a message saying the folder has been mounted. Great! Type G: and press enter to switch to our G drive.
Now let’s check we have all the correct drives mounted. We should have a blank C drive where we will install Windows to, a G drive for our installation media, and a Z drive used by Dosbox. Run mount with no arguments to list all drives, and they should look like this:
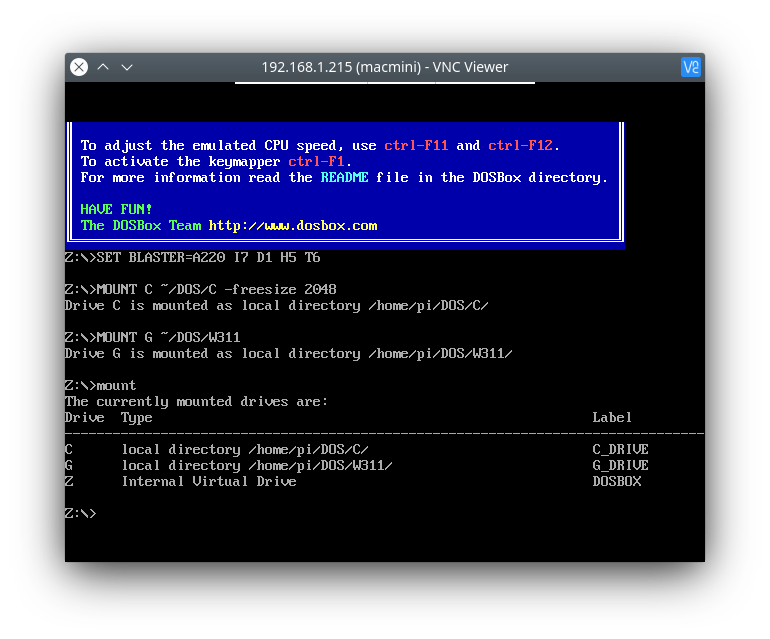
All good? Type SETUP and press enter. The install window will appear!
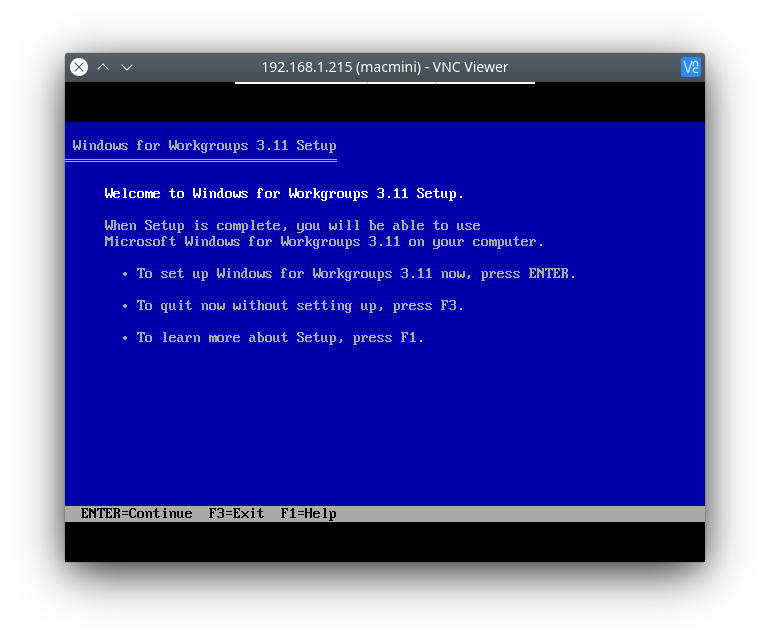
Press Enter, and again to select the Express Setup mode. If you get a red prompt to say it can’t write to the drive, check to make sure a ‘drive’ is mounted to C in the instructions above.
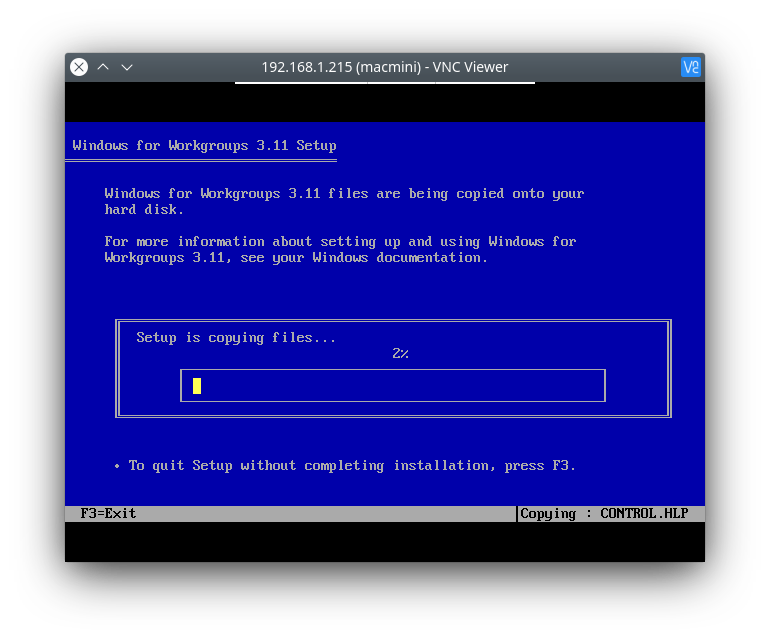
Once this segment finishes (it will take about 1-2 minutes), you’ll then see a more familiar setup screen. Enter a name and company (you don’t need a product number), then continue.

After this, get a drink while the install process takes some time (~6-8 minutes).
When it asks for a printer, press enter to select Install on No Printer Attached.
It will now ask about network settings. Press enter or click continue to skip this segment.
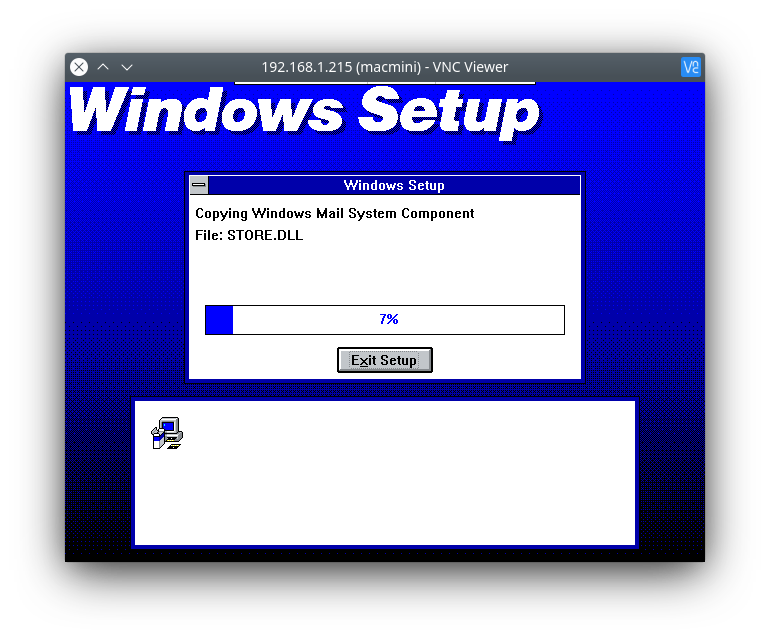
Windows 3.11 will now briefly flash up a visual folder walk where it sets up all the different aspects of the system, and then it will ask if you wish to visit a tutorial. You can go through this if you want an introduction, otherwise I clicked Skip Tutorial.
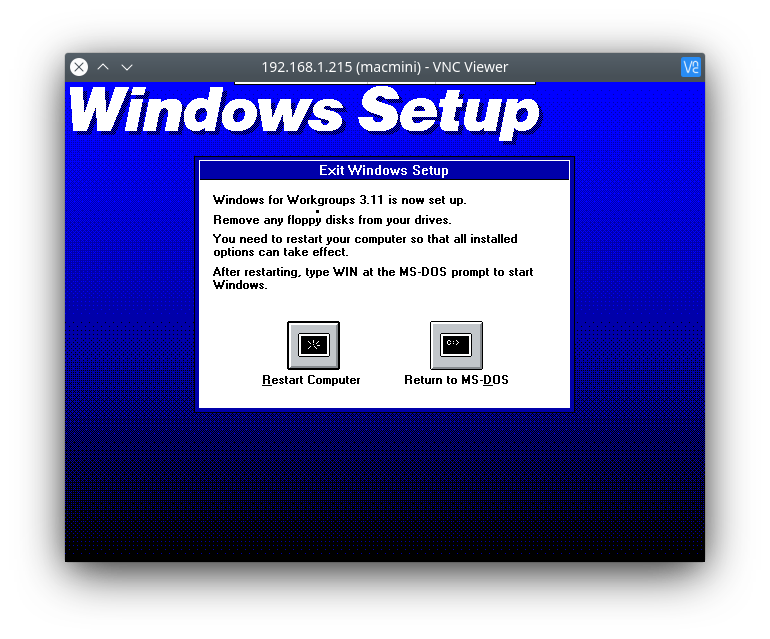
It will now ask if you wish to restart or return to MS-DOS. Click Restart and it will close Dosbox. Congratulations, you’ve installed Windows for Workgroups 3.11!
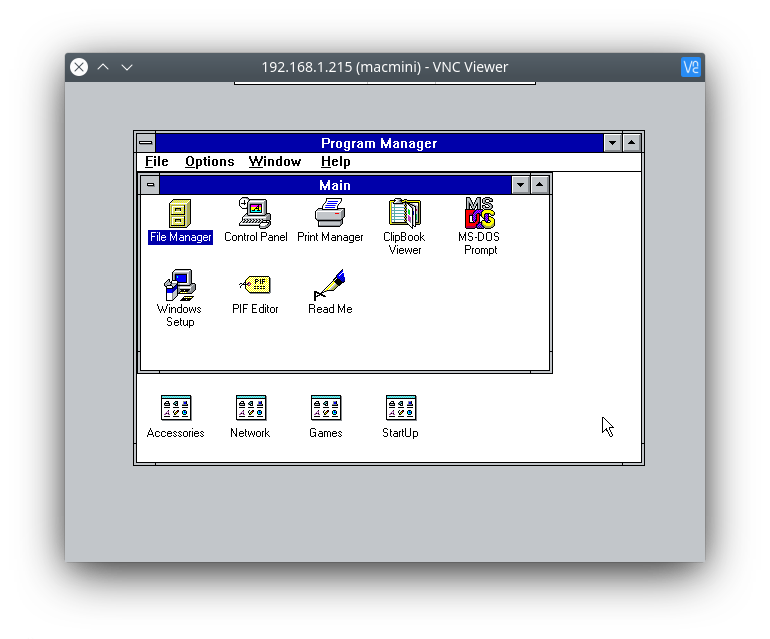
To start Windows, boot up Dosbox. Type c: and press Enter to switch to Windows drive, type AUTOEXEC.BAT and press Enter to see a bunch of commands appear on the screen. Now type win and press Enter, and the Windows GUI will start up.
Cursor doesn’t work?
Unfortunately the cursor does not work so well when Dosbox is run in windowed mode. When you run fullscreen, the cursor runs fine. This is a known issue, and is currently not officially resolved (likely due to the fact Dosbox is for games). In the next guide level, I’ll be exploring Dosbox-X which is supposedly designed for Windows emulation.
❓ Finished

Absolutely not.
In the words of the late Steve Jobs – It just works. That’s great, but not without a cable poking out the top of it! No I ain’t done yet.
The next steps for this cardboard Macintosh is:
- Working rear ports – 2 USB, and a MicroUSB power port.
- External HDMI port… No idea why.
- Internal speaker.
- I’ve bought a three-port USB hub, and a audio DAC… This will be interesting.
- Windows 95.
Cardboard Macintosh 3 months later…

Now with ports and a fake bootloader!
Since the initial cardboard Macintosh build, I was able to add a full-size SD card slot to the front of the unit. I’ve also added two USB ports and a full size HDMI to the right-hand size, a power MicroUSB to the rear, and internal speakers – last bit wasn’t too successful.
Hardware
For the side USB ports, I used a cheap 3-port USB hub that had a dual 2 USB port facing outwards, and 1 USB port facing upwards. In this scenario, the two USB ports are free for use, and inside I added a USB audio DAC to the remaining port. This hub was connected using a female USB-A to male MicroUSB ribbon cable.
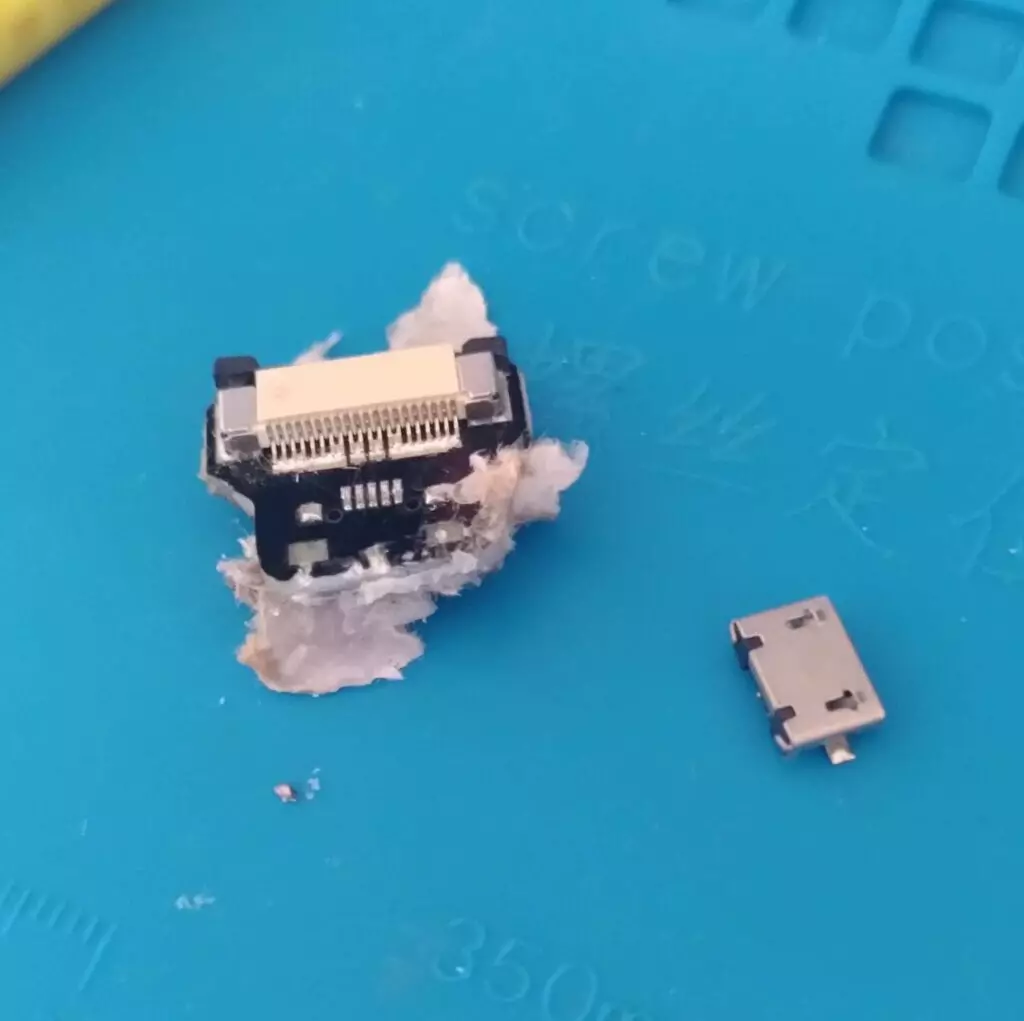
For the power port, I used a female MicroUSB to male MicroUSB variant of the ribbon cable, however the port wasn’t too strong for the repeated connecting of the power cable, so I eventually replaced it with a generic extender lead.
Wub, wub…
For the HDMI port, I used a female HDMI to male mini HDMI ribbon cable. While this works as a viable HDMI port, the LCD screen I used takes over most of the HDMI operations. This ends up being useful for the initial setup without using WiFi, but not much use after that.
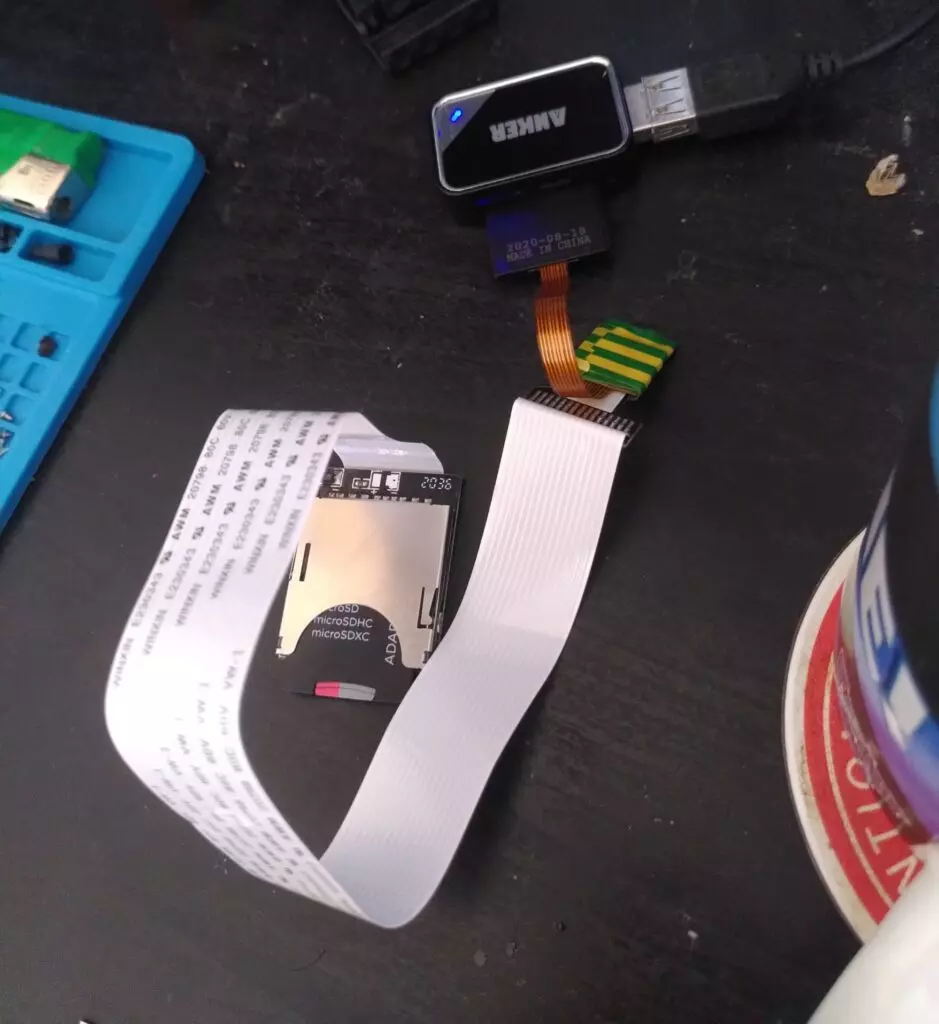
the front-facing SD slot was the most problematic. Since I’d already glued everything together, I used my knife to effectively carve out the required gap for the card slot. I also discovered the gap between Pi and wall wasn’t big enough for the converter to fit comfortably in. Using a combination of a very tiny MicroSD extender and a MicroSD to regular SD cables, I was able to get the front panel slot working.
Lastly, but non-successful was the speakers. The jack port is solved by the DAC mentioned earlier. However, I wanted in-built speakers instead of relying on plugging them in. I had a parted-out laptop lying around, so I converted the speaker module from the laptop to use 3.5mm jack. Simple right?
The speaker was incredibly quiet. So it does work, but you have to be point blank to the device to hear it. I believe the module I extracted from the laptop was using a powered chip to boost the audio. With an already high number of peripherals (USB hub and screen) I think I reached the limit of what juice I could squeeze out of the Pi without getting a higher voltage power supply. I decided to cut my losses at this point.
Software

Glorious, glorious retro beige…
To show off the device, I had two shell scripts on the desktop that would start-up their relevant OS 9 or DOS operating system. This works well, but I wanted something prettier.
Using Python and with some assistance from the lovely engineers over at the Technical Family Discord, the desktop scripts were replaced with a visual bootloader application. Just makes the whole thing a bit prettier to look at when it started up.
If you decide to use this same application, the clickable buttons are configurable, so if you wish to dedicate the device to just System 7 (like it really should be), you can just show that script instead.