And this completes my PlayStation console collection… If we ignore the PS5.
A lot of things happened at once to trigger this project. I had not bought a Pi 4 at this point, and I had the PlayStations 2-4…
Next minute I’ve bought a dead PSOne off eBay, a Pi from the Pi Hut, and waved goodbye to my bank account… In December.
The idea was incredibly simple – Whack a Pi 4 inside a PSOne shell, with the toggle button and LED still functioning. With such a simple project, the idea can expand in phases (powered USB ports, hard drive storage, etc).
⚠️ Since this article came out, Retroflag now offer a Pi 4 case inspired by the PlayStation Classic. I recommend this method far more than cannibalising an existing PSone, and can come with a screen option if you so wish.
🛒 What I Bought
(The links below are not affiliates).
- Dead Sony PSOne (bagged mine for £3, eBay).
- Raspberry Pi 4, 2 GB* (Pi Hut).
- Official USB-C Power Supply (Pi Hut).
- MicroSD.
- Petrockblock’s Powerblock (Pi Hut).
- HDMI ribbon receptacle (AliExpress).
- M2.5 screws (AliExpress) & M2.5 Standoffs (AliExpress).
- Power status LED (1 needed, AliExpress).
- USB pinout, connectors & receptacles (AliExpress).
- Wire (I used 28 AWG, AliExpress).
- Heatsinks (AliExpress).
I already had, but also needed:
- Soldering equipment (iron, solder, sucker).
- Hot glue gun.
- Cutting tools (I MacGyvered with diagonal pliers).
- Safety googles (I didn’t have these, and nearly injured myself).
⚠️ Excluding the tools, the whole project (at this stage) cost me £120. Albeit, if you follow my steps you’ll end up with quite a lot of re-usable resource.
* You can go for a higher RAM, but emulation mostly requires more powerful CPUs. If you’re planning to operate the Pi as a console, then the higher RAM will go to waste. You can find a discussion about it here.
📕 The Plan
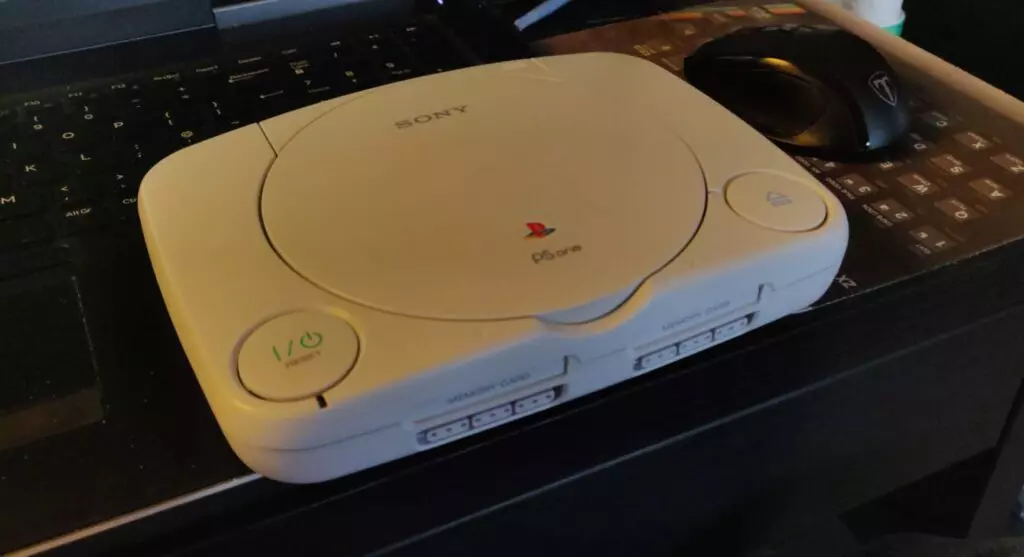
Purchased PS One console before modifications
Dead PSOne from a bodged-up mod chip job.
My current goals for the project were:
- The original toggle button functions with the Pi.
- LED indicator comes through the existing beam channel.
- Accessible power, USB and HDMI port(s).
- Keep casing modifications to a minimum.
- No affixing components directly to the plastic.
- Ability to cool the Pi, or add a fan at a later stage.
First two are pretty much dealt with by the Powerblock module. The rest will be where the challenge lies.
I had a hell of a time trying to figure out actually where the Pi would sit inside the casing. Now more than ever, cooling is fundamental due to the sheer power the Pi 4 is packing. I could place the Pi in normally, but I would potentially need to add vents, or use the disc tray door as a vent.
I’d recently bought a Mega Drive case from Retroflag. Their method of dealing with the cooling was to have the Raspberry Pi upside down, with a heatsink and a fan venting out below. This is applicable to the PSOne shell, as there’s vents at the bottom. I opted to go with this approach, which would require me to modify the Powerblock module.
I mounted the Pi so that the USB-C port on the Powerblock was facing the barrel jack connector slot.
Unfortunately I found with my spacers that the Pi was an extremely snug fit, which concerned me. I removed the centre columns, and some struts underneath the top casing. Doing this I found that I over-did mine, so I’d advise caution if you take this approach. I also chopped the square of the barrel recess out to allow for the USB-C connector to come through.
🚧 Hardware, the complex bit
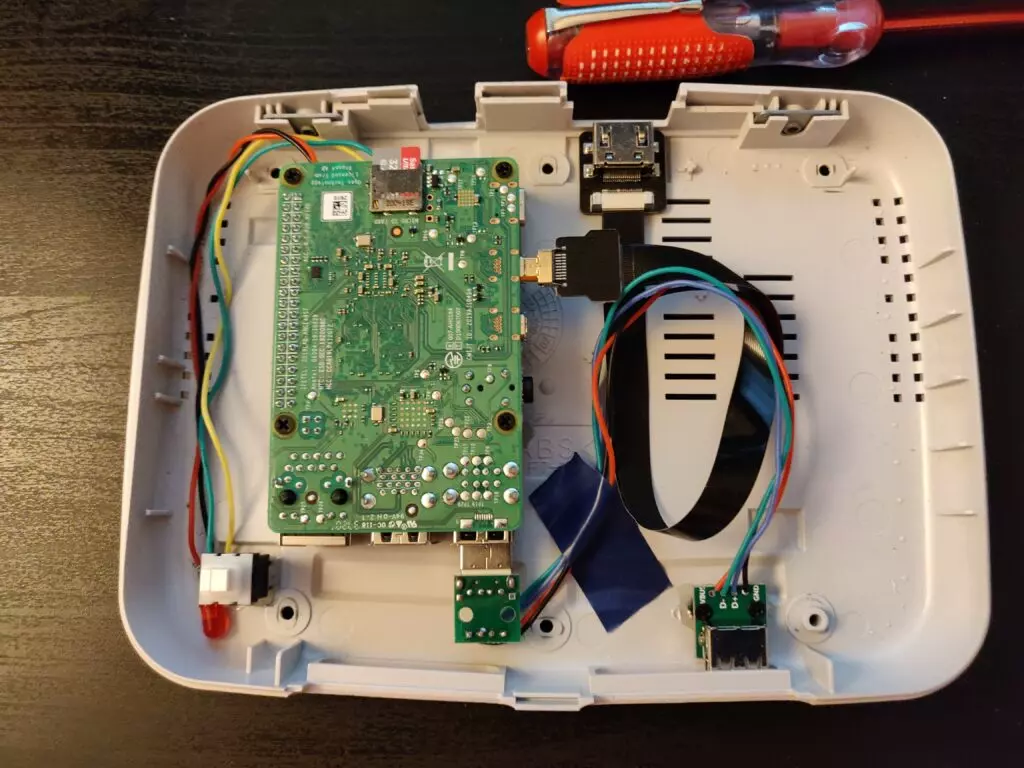
Eagle view of the modified PS One with the circuits exposed
Top view of the circuit. Pi is upside down for a future fan addition, and the power port (unpictured) is in-line with the port gap.
I opted to use the original hardware toggle switch. This needs to be de-soldered from the board, which is an absolute nightmare. A few hours with both the braid and the sucker, and I finally got the component off the board. Bear in mind that the button grips the board, so you will need to pry the legs away slightly. Once off, check with a multimeter to establish polarity (although it’s just a box-standard toggle switch).
With the orientation decided, I marked on the casing where the mounting holes of the Pi would align to the plastic. On these points, I glued four of the 2.5M standoffs to provide a solid base, without sticking the Pi down (bear in mind 2 will be smaller, and 2 are larger).
Before the Pi will fit snug onto the mounts, the Powerblock’s LED and button headers need to be dealt with. You can bend them away (avoid them touching), trim them, or de-solder them from the board. I chose the latter, opting to solder wires into their points instead. YMMV.
I wired up the LED and button to the Powerblock with the cables and solder, and glued the button directly to the plastic in the recess. I found the LED went nicely next to it, and shines bright through the channel… But also through the gaps and the hole from the controller connector.
The ribbon HDMI connector is easily put together, and can nicely convert the Micro HDMI to a full-size HDMI receptacle in the gap where the AV socket was. Word of caution here that I fell foul of, is that if you glue the socket board straight into the recess, your HDMI cables might rub against the plastic casing. I would recommend propping them up with a few nuts from the standoff kit.
You should be able to test the system at this point, and it should start up! There’s no driver installed yet, so it might behave strangely, but it should at least turn the Pi on and dimly light the LED.
💿 Software, the easy bit
For software, I went for RetroPie. I chose this because it’s the package I’m most familiar with, but RecalBox is also available if you want a more ready-rolled system.
NeoZeroo on YouTube hosts a 1080p fan render of the famous PS1 boot intro. This can be used as a splash screen with RetroPie, and works fantastically at that! Once set, you’ll be greeted with the famous boom upon each boot. Enable quiet boot to hide the boot text.
You can install a theme that styles the Emulation Station to look like the PlayStation 1 no-disc boot interface.
All that’s left now is to start ripping your original PlayStation discs on a computer, sticking them on your RetroPie and playing like the PlayStation you could only dream would exist in the 00’s! And while you’re there, don’t forget the other classics it can handle – from Atari to Dreamcast.
🕹️ Verdict
The end result – while taking quite a bit of effort to construct – is fantastic. You now have a PlayStation One looking device that supports HDMI and can run many different consoles outside of Just the PlayStation 1. The perfect emulation machine.
Built in February, I have been using this device religiously. The problem with Retro builds is that you often shelve them a few months after you’ve finished, but the performance and stability of this model is excellent, so it remains in use to this day.
I wish to make a few changes in time, but I haven’t got round to these yet. These include:
- Adding more USB ports, and a cover fascia (so you can’t see inside via the controller recess).
- Possibly bring back the original controller connectors, and convert them to USB.
- Add a small fan (in progress).
But otherwise – as-is – this PlayStation become my favourite emulation machine.